I prefer to make cherry jam without seeds so as not to be distracted by them when drinking tea. But in the article I’ll tell you about different options – including those with bones.
The first time in my life I made cherry jam when I was about 25. I was just learning the science of canning and not everything worked out. I cooked it with bones. At that time, I didn’t know that they could be removed and, of course, I didn’t know how. There were no removal devices.
Now I have several different ones and even almost automatic ones. It looks roughly like a manual meat grinder (remember, every family used to have one of these). Berries are thrown into the funnel and they go down the tunnel to a certain place. Then you press the handle, which, like a hole punch, makes a hole in the cherry and at the same time pushes the pit out. Very convenient and saves a lot of time.

Cherries are useful both fresh and canned. She helps:
- For cardiovascular diseases;
- Strengthens the immune system, so it is useful to use it during the cold season;
- Increases hemoglobin and is useful for anemia;
- Reduces the risk of blood clots;
- Normalizes cholesterol levels.
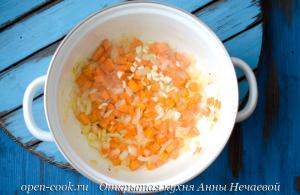
Cooking with seeds is quite simple. First, we prepare the berries - rinse them under running water, let the water drain and dry them on a towel.
For jam, take a kilogram of berries and a kilogram of granulated sugar. Usually they also take water. But I believe that we can do without it. Cherries contain a lot of water and the jam may be too runny. I don't like it that way.
I prick the fruits with a toothpick. This is necessary so that the skin does not wrinkle and the berries look beautiful. If you don’t care about the outside, then you can immediately start making the jam - you’ll save time.

I sprinkle the cherries with sugar, in layers, and let them sit for a while to release the juice. If you are in a hurry, you can skip this step and start cooking straight away.

You can speed up the process of juice extraction using a regular potato masher. Lightly crush the berries with it - the juice will stand out, which means it’s time to start cooking.

I put it on low heat and stir the sugar (otherwise it may burn) with a wooden spatula. I remove the resulting foam at the very end of the process.
I boil it at boiling water for twenty minutes. As you can see, there was a lot of liquid even without adding water. While the berries were cooking, prepare the jars. Wash with soda, bake in the oven or microwave.

Spread the jam while it's hot. To prevent the jars from bursting, place them in a cup, and then pour in the treat. Seal with lids.
Five-minute cherry jam with pits
I like five-minute jams best. It takes much less time, but it turns out delicious.
For 1 kg of cherries we take 900 g of sugar
- Separate debris, twigs from berries, wash and dry;
- Mix the berries with sugar and let it brew until the juice appears;
- Heat the container with the mass to a boil and keep it on the stove for five minutes over low heat;
- Set aside until cool;
- Then boil again for five minutes and cool;
- We do this three times;
- After the last time, cool slightly and pour into jars, roll up the lids.
How to make cherry jam so that it is thick
Since I found a device for extracting seeds, I began to cook only seedless jam. Of course, it takes more time, but in the end the time spent is worth it.
We clean the cherries from debris, wash and dry.
We remove the seeds using any available method.

Let the cherries stand for half an hour. She will give you juice. Put it on the fire, bring it to about 70 degrees (this is approximately like hot tea), remove from the heat. Drain the liquid through a colander. The juice can be drunk immediately or stored away for the winter. It turns out decently.
To obtain thick jam, get rid of excess juice. This will reduce cooking time.
We weigh the pitted cherries and take the same amount of sugar.

Add sugar to the berries, mix and see that there is a lot of juice again.
Place the container with the mixture on the fire and bring to a boil.

Boil for 15 minutes over low heat, pour into prepared jars while hot. Cover with nylon lids and cool on the table.
Thick seedless jam for the winter with color retention
In order for the jam to be thick and the berries to retain their beneficial properties to the maximum, you can prepare the jam according to the following recipe.
Berries and sugar are taken in equal quantities.
- The fruits are freed from leaves and twigs, washed and dried. If necessary, you can remove the seeds;
- Add half of the granulated sugar to the cherries and leave overnight until the juice releases;
- Place on the fire and boil for 15 minutes, cool;
- Drain the juice, add the remaining half of the sugar and cook further without the berries;
- Boil the syrup until ready. How to check readiness? Pour some syrup into a cup of cold water. If the drop does not spread, it means it is ready;
- After the syrup is ready, pour the berries into it, mix and roll into jars.
If you want to get thick cherry jam, then the proportion of sugar to berries is 2 to 1. In this case, the syrup turns out thick.

Frozen cherry jam
Cherries can be frozen. How? Read below. And throughout the year you can enjoy fresh jam. Depending on what kind of cherries you have in the freezer—with or without pits—we will make this kind of jam.
For a kilogram of berries, 700 grams of sugar is enough. It won't be so sweet.
- Sprinkle the frozen berries with sugar in layers and place on low heat, stirring constantly so that the mixture does not burn;
- After boiling, cook for 15-20 minutes.
Now there are options. If you cook without seeds, you can puree the mixture in a blender and boil again for 10 minutes. If it has seeds, then immediately pour it into jars.
By the way, to enhance the taste, you can add cinnamon at the end of cooking.
Recipe for cooking in a slow cooker
Jam in a slow cooker is the easiest recipe to make. For a kilogram of cherries we take a kilogram of sugar and 100 ml of water.
- Place sugar and cherries in the multicooker bowl, add water and stir;
- Turn on the “Quenching” mode for one hour;
- Place into sterilized jars.
Jam without seeds can be stored for 2-3 months longer than with seeds.

Cherry jam with gelatin
Cherries do not have a high gelling property, such as gooseberries or currants. Therefore, to make jam, you need to add either another berry or gelatin. I will give two options.
To prepare, you will need 400 grams of sugar, 100 grams of water and 20 grams of gelatin for 800 kilograms of pitted cherries.

Prepare the berries and cover with sugar, wait until the juice appears. One hour will be enough.

Beat with a blender and place the pan with the ground mixture on the fire.
Let the gelatin swell in 100 grams of water for half an hour. If necessary, strain.

Bring the mixture to a boil, simmer for 20 minutes. The resulting foam must be removed from the surface.

Then add the bloomed gelatin in a thin stream with constant stirring.

Boil for literally 1 minute and pour into jars. Otherwise, the gelatin will set when it hardens, and it will no longer be possible to pour it.
Cherry and gooseberry jam recipe
Gooseberries act as a gelling agent. For 1 kg of cherries, take 200 grams of gooseberries, 1 kg of sugar and a few tablespoons of water.
- We sort out the cherries and gooseberries, wash them separately, and dry them;
- Punch the cherries in a blender or grind them in a meat grinder (if there are a lot of them), add granulated sugar and put on fire;
- Bring to a boil, reduce heat and simmer for 15 minutes;
- Fill the gooseberries with cold water and heat. When the peel bursts, rub through a sieve. We use only juice;
- Add the juice to the cherry mixture and simmer until tender.

Cherry leaf liqueur
I prepare this liqueur in the fall, when chokeberries ripen.
You will need:
- 100 grams of chokeberry
- 100 grams of cherry leaves
- 800 grams of granulated sugar
- 800 - 1000 ml water
- 2 tsp citric acid
- 0.5 l vodka
Preparation:
- Wash the chokeberry and cherry leaves, dry and crush;
- Pour water over the mixture and boil for 10 minutes;
- Add sugar, citric acid to the resulting syrup and boil for another 20 minutes;
- Cool, strain through cheesecloth and pour in vodka. Mix everything.
- I bottle it and put it in the closet for storage. Stores well at room temperature.

Cherry compote
It's nice to open a jar of compote in winter. It can be made from one cherry or mixed different berries. For a three-liter jar I take a glass of sugar.
- We clean the berries, wash them and dry them. I usually pierce the cherry with a toothpick to prevent it from bursting. But you don't have to do this;
- I pour berries (or a mixture of different ones) into half the jar, pour boiling water over them and let stand for a couple of minutes;
- I pour it back into the pan and add sugar;
- I bring the syrup to a boil, pour the berries a second time and roll them into sterilized jars.
How to freeze cherries
I use frozen cherries to fill pies or bake an open pie with them. Dumplings, compote, desserts also turn out very tasty.
I prepare the berries, remove the seeds and place them in containers, sprinkling them with a little sugar. I put it in the freezer.
Now you know several options for cherry jam. I hope you will take my advice. If you have your own family recipe, share it in the comments. Have a delicious summer!
You can also listen to a song about cherry jam.
Today I will share the most successful recipes for cherry jam. Cherry jam is one of my family's favorites.

Cherry jam is in demand in almost every family. Its taste is so wonderful that it began to be called “royal” jam. And if you add cinnamon and a couple of drops of cognac to it, the aroma will become more refined.
To make jam, you need the following ingredients:
- one kilogram of cherries
- half a kilo of sugar
- teaspoon cognac
- aromatic cinnamon
How to make cherry jam?
First, the cherries must be thoroughly washed to remove dirt and spoiled berries. I recommend using gloves before pitting. 
- Take a toothpick and carefully remove the seeds to preserve the shape of the berry as much as possible. To do this, slowly pierce the center with a toothpick. Place the removed bones in a sieve, under which you should place a cup. The collected juice is also useful during the cooking process.
- Next, put all the cherries into a large cup. Pour the resulting juice there and sprinkle sugar on top. Leave the cherries in this state for 5-6 hours until juice forms.
- Mix the berries with sugar well and leave for a couple of hours for the ruby juice to appear. If the berry is sweet and ripe, then the volume of juice should reach 50% of the total amount.
- Mix everything thoroughly with the resulting syrup and boil on the stove.
- After it boils, boil the mixture over medium heat for about 10-15 minutes.
- As soon as everything thickens, turn it off and forget for a while.
- The next day it is also necessary to boil and leave for another night.
- Next, boil, add cognac and a cinnamon stick. Immediately pour everything into jars, which must first be sterilized.
You should not boil the jam with cognac for more than three minutes!
This multi-stage cooking method allows you to preserve the color of cherry jam, giving it an amazing taste and alluring aroma. Your family will appreciate the dish, which is perfect for pancakes, for filling a pie or as a sweet for tea. Bon appetit!
Cherry jam with pits

In many families, cherry jam is a favorite for sweet treats. There are many options for preparing the delicacy. One of the popular ones is cherry jam with pits, which is incredibly tasty and easy to prepare. Therefore, even novice cooks can prepare this dish.
Required ingredients:
- Cherry – 1 kilogram
- Sugar – 1 kilogram
Process for making cherry jam:
- First of all, the cherries must be cleaned of dirt, rotten and diseased berries must be removed so that they do not spoil the jam.
- Carefully remove the stems so as not to damage the berries.
- After the cleaning process, pour the cherries into a large cup or basin and sprinkle sugar on top. It is worth noting that if you have too many cherries, then on the first day you should add half the portion of sugar, and only then, during the cooking process, add the rest.
- We forget about a lot of hours for 6-7 so that our berries give juice. I always leave it overnight.
- The next day you should also boil the jam and leave it to cool. This step-by-step process will help you prepare a divine-tasting treat.
- In the evening we set it to boil again. If you don’t particularly like thick delicacies, then you can already pour it into jars at this stage.
If you want it thicker, you should leave it for another day and repeat the same manipulations. - We put everything into jars and roll them tightly.
It is worth noting that the jars should be turned upside down, and only after cooling can they be put away in the cellar or closet before the onset of winter. It’s better to put the seams away, because if it catches your eye, it can be eaten in a matter of minutes.
In this simple way you can prepare cherry jam, which will not only decorate the table, but will also appeal to all sweet tooth lovers. It is unlikely that there will be any sweetness left for filling the pie, since not only children, but also adults will gobble it up on both cheeks.
Recipe for cherry jam with rum in syrup

In my family, cherry jam is one of the most delicious treats in the winter season. However, few housewives know that cherries can be used to make more original desserts that do not require much time. This cherry jam recipe is just one of those.
To prepare, take:
- a large spoon of cognac or rum,
- four large spoons of vanilla sugar,
- one kilogram of sugar,
- three kilograms of berries.
How to prepare cherry jam in aromatic syrup with cognac or rum?
- Make sure you don't come across any diseased or rotten berries, which could spoil the taste of the delicacy.
- Mix vanilla and regular sugar, then carefully and carefully remove the pits from the washed cherries and sterilize the small jars.
- Place the ingredients in them: add a couple of tablespoons of sugar to the bottom, then add a small layer of cherries and repeat until the container is filled to the brim. The last, final layer should be sugar.
- Press down each layer lightly with a wooden spatula, but do not overdo it. Wait and soon the cherries will give amber juice, which will cover the top layer of the berries.
- Place a small towel on the bottom of a large saucepan, place a jar of berries on it, and cover it with a sterilized lid.
- Fill a saucepan with warm water up to the shoulders of the jar and heat over medium heat.
- After the mixture boils, reduce the heat and continue to sterilize the jar for at least 15-20 minutes.
- Carefully remove the hot jar from the pan so as not to burn yourself, pour rum into it and immediately roll it up so that the smell does not have time to dissipate.
Turn the jar over and keep it like this for at least a day. Store canned food in a dark place in a kitchen cabinet or pantry. It will take no more than an hour to prepare the dessert without waiting.
This recipe for cherry jam will be a godsend for many cooks who want to add some zest to their dish and surprise their guests.
Recipe for cherry confiture with almonds

The amazing taste, color and aroma of cherry confiture will put you in the mood for the whole day. Perfect for breakfast with a bun or cheese. I recommend adding cherry confiture to game or poultry dishes.
To prepare cherry jam, take:
- a small spoon of citric acid,
- two large spoons of cognac,
- two small spoons of vanillin,
- a pinch of ground cinnamon,
- a large spoon of gelfix,
- 80 grams of unroasted peeled almonds,
- kilogram of sugar
- kilogram of cherries.
How to prepare cherry jam?
- Few people know how to prepare cherry confiture. But those who have tried it at least once will no longer be able to resist. The preparation is quite simple, so even a culinary novice can handle it.
- First, remove the seeds from the washed and selected berries, beat thoroughly with a blender until a consistency reminiscent of puree, then mix the zhelfix with two tablespoons of sugar. Usually it is specifically used to make jam thicker; unlike gelatin, gelatin does not impart a meaty taste to food. It is also perfect for those who value healthy food.
- Add it to the puree and lightly beat again.
- Bring the cherry puree to a boil over low heat, add the remaining sugar, cinnamon, vanillin and citric acid.
- Lightly chop the almonds and also add to the resulting puree.
- Boil for ten to fifteen minutes, stirring constantly, pour cognac into the mixture, increase the heat and cook for exactly three minutes.
- After this, transfer into sterilized small jars, roll up, turn them upside down and leave for 24 hours.
Store the finished confiture in a dark place. It will take no more than forty minutes to prepare the dessert without waiting.
Adults and children will love this dish, and your guests will be pleasantly surprised that you can prepare a real culinary miracle from simple fruits.
Recipe for cherry jam with walnuts

Many people remember the taste of homemade cherry jam from childhood. Nowadays, some people prefer to buy a ready-made product in the store, while others, on the contrary, want to experiment and prepare something unique. Walnuts added to the dish will not spoil it at all, but will only add a special piquancy and taste. This recipe is designed for long-term storage of the product, so you can roll up the jam in large quantities.
To prepare, take the following products:
- two small spoons of vanillin,
- a large spoon of gelfix,
- 300 grams of shelled walnuts,
- 800 grams of sugar,
- kilogram of cherries.
How to make cherry jam with walnuts:
- Remove the pits from the washed cherries using a toothpick or pin, place in a saucepan and cook for ten to fifteen minutes.
- Mix three tablespoons of sugar with jellyfix.
- Pour the resulting mixture into the hot cherries and continue cooking for five minutes, stirring constantly to avoid burning.
- Crush the peeled walnuts into small pieces, add them along with vanilla to the cherry mixture, simmer over low heat for another three minutes.
- Transfer the finished jam into small, pre-sterilized jars, roll up, and then leave upside down for one day to cool.
Store the jam in a dark place in the pantry or cupboard. The cherry dessert will take thirty minutes to prepare without waiting.
Your family and friends will not be able to tear themselves away from this delicacy, which can be enjoyed simply with tea or a bun. Even a schoolchild who is just learning the culinary arts can make cherry jam so quickly.
Don't forget to prepare for the winter.
We will be happy to answer any of your questions in the comments.
Summer is the richest time for various kinds of berries and fruits. And we all try not only to eat our fill of them, but also to prepare more of them. Therefore, we freeze them, dry them, and prepare compotes and jam.
Imagine how great it will be to open a jar of this summer delicacy on a cold winter day or evening, and drink tea with it, spreading it in a thick layer on the edge of black bread. And some people also like to spread butter on the bread first, and then add sweets. Moreover, this sweetness is always served with interest, so that it drips both on your hands and on the plate, if you managed to put it on. What a pleasure it is!
And it comes from childhood. Probably everyone loved to eat this way. After all, there weren’t so many sweets in stores, but they always made jam. It was in those days the most important children's joy.
And it has always been revered in a special way, made from pitted cherries - for its incredible aroma, rich color and magical taste. It was one of our favorites, which we, as children, spread in a thick layer on bread.
And our grandmothers used it as a filling for pies and pies. What wonderful pies they turned out to be! If there were bones in it, what kind of filling would it be? You could even break a tooth on one of these.
Therefore, we chose a day, went out into the street with a basin and fruits, armed ourselves with a hairpin, and fell into meditation for 4 hours. Cherries in a bowl, and pits in a bowl. Only then did the first stone removers begin to appear. And when one of the neighbors became its first owner, after boiling his cherry delicacy, this simple device was already walking around all the neighbors.
Then they prepared one, maximum two options from berries and fruits of the same variety. But now there is simply an incredible amount of delicious recipes where you can cook according to the classic method and use unusual, original options.
The classic method includes “five-minute ones,” both with and without proofing, and original versions are prepared using chocolate, coffee, cocoa, spices, and the addition of other berries and fruits.
And today we will prepare our delicacy in various ways so that everyone can choose a recipe to suit their taste.
Personally, I really love this particular option, and every year I prepare several jars of it. The finished product is thick and very tasty.
We will need:
- cherry – 1 kg
- sugar - 1 kg
I always add sugar in this recipe in this proportion. The finished delicacy is perfectly stored, does not become candied and remains tasty and thick throughout the entire storage period.
Preparation:
This cooking method is called "proofing". And it owes its name to the fact that we first heat the fruits together with sugar to a boil, and then let them brew for 12 to 24 hours. And so three times. That is, the time for preparing jam using this method will be 2 - 3 days.
But this, of course, does not mean that we will stand at the stove all this time. You will need to cook the contents three times for 5 minutes. And the rest of the time the cherries will be saturated with syrup and their own juice. I call this method the “long five-minute”
1. Sort the fruits, remove damaged and rotten fruits and stalks. Rinse in several waters, then place on a towel or napkin and let the water drain.

The juice stains the fabric, so take this into account when drying the fruit.
2. Pour some sugar into the cooking basin and begin removing the seeds directly above this basin. The cherries are very juicy and be prepared that when cleaning, this juice will directly flow into the container.
The seeds can be removed using a special device or a pin. At the end of the article you can watch a video on this topic.
3. As soon as a small layer of peeled fruits forms, sprinkle them with sugar again. And so alternate until one and the other are finished. Stir to release the juice quickly.

4. Leave to infuse and form more juice for 3 - 4 hours. If you don’t have time, you can stir after another half hour and immediately proceed to the next step.

5. Place on low heat and heat the contents while stirring, and then ensure the sugar dissolves. When the sugar no longer lies on the bottom in a thick layer, but has melted slightly, the heat can be increased to medium. You can check this by picking it up from the bottom with a spatula.

At all stages of heating and melting, it is necessary to stir the mass so that the sugar does not burn. However, do this carefully so as not to damage the integrity of the berries.
6. Wait until the syrup boils. Then shake the basin so that all the fruits are in the hot syrup. The boiling will stop for a while, but will resume very soon. It is from this time that you will need to time exactly 5 minutes.
7. During this time, remove the resulting foam. It is necessary to remove the foam, since without it the jam will be of higher quality, and it is also important that it will be stored better.

8. After 5 minutes of boiling, turn off the fire, and place the basin with the contents in a secluded place where small children and animals cannot reach it, so that they do not accidentally tip it over themselves.
After the syrup has cooled, cover it with a towel. And to prevent it from falling into the basin, first cover it with an oven rack.
9. Leave to infuse for 12 to 24 hours. I leave it for 24 hours so that the fruits can fully rest and be saturated with juice. But 12 hours can also be enough, especially if you don't have a lot of time.
10. After the allotted time, put the contents back on the fire and repeat the procedure - bring it to a boil again and cook for 5 minutes, skimming off the foam.

11. Let it cool again and leave for another 12 - 24 hours.
12. And then put it on the fire for the third time, again for 5 minutes.
13. By the third time we must prepare the jars and lids. I use screw caps, but you can also use ones that are sealed with a seaming machine.
Either one or the other, together with the jars, should be thoroughly washed and sterilized.
14. Pour the boiling delicacy into jars and seal with lids. Turn them upside down, cover with a towel and let cool.

15. Then store in a dark, cool place.
The jam turns out thick, with a lot of fruit and a small amount of syrup. As I said, it keeps well. Can be stored even for more than a year. But if stored for too long, it becomes very thick and the fruits wrinkle, and the syrup becomes darker.
Therefore, it is better to use it within a year.
And during the prescribed period, the fruits remain whole, not soft. The syrup is thick, beautiful ruby color.

Do not cook fruit for more than 5 minutes at a time. Otherwise, it will lose its color and become too thick and dark. It should not be boiled, but rather infused; during this time the cherries should be soaked in syrup as much as possible.
Overall the recipe is simple. The most difficult and time-consuming thing about it is removing the seeds. And the rest of the process is just pure pleasure! Yes, and removing bones is also a pleasant activity, it is even somewhat akin to meditation. Especially with your favorite music!
Cherry “Pyatiminutka” without seeds
As has been noted more than once in other articles, “five-minute” cooking is a very popular cooking option for many fruits and berries. And when we did, we of course used it too.
And today we will cook the same, but without seeds.
We will need:
- pitted cherries - 1 kg
- sugar - 0.5 kg
This recipe gives the minimum sugar consumption per kilogram of fruit. If you have a sweet tooth, you can add sugar. The proportion of berries and sugar is allowed, both in this recipe and one to one (per kilogram of fruit, kilogram of sugar), as well as all its intermediate options.
In the same proportion, the product will turn out sweet and sour.
The weight of the fruit is given without seeds.
Preparation:
1. Rinse the cherries thoroughly and let the water drain. Remove seeds and stalks. To remove seeds, you can use a special device for removing them, or, if you don’t have one, then use a regular hairpin. At the end of the article there will be a video showing how to do this.

While you remove the seeds, a lot of juice will come out. So put some sugar in the bottom of the cooking pot, and then sprinkle it over it as you clean further.
We need the sugar to begin to melt under the influence of the juice. Therefore, it is better to pour it not after everything has been cleaned, but before the juice immediately begins its work.
2. Leave the basin for 3 - 4 hours so that enough juice is released for subsequent cooking.
3. After this time, place the basin with all its contents on medium heat. Heat it until the sugar completely melts. At the same time, be sure to stir and make sure that it does not burn.

It is clear that if this happens, then the entire final product will have a burnt smell along with its unforgettable aroma. There will be no way to get rid of it.
4. As soon as the syrup boils, shake the bowl with the contents so that all the fruits are “bathed” in the syrup. The boiling will stop briefly, but will soon resume. Once this happens, it's time to time it.
It will take us exactly 5 minutes for it to cook completely. During this period, you can “bathe” the fruits a couple more times by gently shaking the basin.
5. And during this time you still need to have time to remove the resulting foam.

6. By the end of cooking, we should already have sterilized jars and lids ready. Quickly pour the jam into the jars, immediately close the lids and roll them up.
While it is still hot, it is liquid. But don't let this scare you. It will cool down and become thicker.
7. Turn the jars upside down and wrap them in a towel or blanket. Leave in this position until completely cooled.

8. Then turn them over again into their usual position and store them in a dark, cool place. In your house you can store it in the basement, and in your apartment - in the pantry.
This cooking option is good because the cooking itself takes very little time. And the fruits retain the maximum amount of vitamins and microelements.
Of course, it takes a long time to remove the seeds, but what a delicacy you can treat all your family and friends in winter!
Very thick “Five Minute” with gelatin
Everyone loves thick jam. And many people believe that the thicker it is, the tastier it is. And there are options for preparing it in the form of jelly, and quite simple ones. You can simply boil the syrup, I have already shared this recipe as an example
There is another option in which you can simply add gelatin during cooking. This is the option I want to bring to your attention.
The calculation of ingredients will be given for 3 liters of the finished product. If there is a lot of this, then you can simply reduce their number proportionally.
We will need:
- cherry – 3 kg
- sugar - 1 kg
- gelatin – 70 gr
- water - 0.5 liters
With this amount of sugar, the jam will turn out sweet and sour. If you like it sweeter, you can add sugar. Sometimes they ask whether it is possible to use 400 grams of sugar per kilogram of cherries. Can. And this recipe calls for even less of it.

Preparation:
1. Sort the fruits, remove damaged fruits and stalks. Then rinse thoroughly in several waters and let the water drain.
2. Remove the seeds using a special device, a hairpin or a pin. It is better to do this immediately over the basin, in which we will cook in the future.
Immediately pour a little sugar into the bottom of this basin so that the resulting juice melts it faster.
As the number of cherries in the bowl increases, they also need to be sprinkled with sugar. Thus, by the time we clean it all, a sufficient amount of juice will already form in the basin.
3. Soak the gelatin in cool water and leave to swell for about 30 - 40 minutes, according to the instructions on the package. In the meantime, it will release even more juice.
4. After 30-40 minutes, carefully move the contents in the basin with a spoon to move the sugar from the bottom. Place the bowl on low heat and periodically moving the sugar in the bowl, wait until the mass becomes liquid. This means the sugar has melted.
The heat can be increased to medium. And while stirring, bring the whole mass to a boil.
5. At the same time, put the swollen gelatin on a small fire and, while stirring, bring it to a liquid state.
6. As soon as the jam boils, note the time. We will need 5 minutes. At the same time, do not forget to stir. The resulting foam must be removed.

7. After the allotted time, pour gelatin into the basin in a thin stream while stirring continuously.
Bring to a boil again and turn off immediately.
8. We should already have sterilized jars and lids ready. While hot, pour the jam into jars and screw on the lids. Place them upside down and cover with a blanket. Leave until completely cool.

Since it was cooked for only 5 minutes, this procedure is mandatory for it. Under a blanket, with slow cooling, the product will be sterilized and will be better stored.
9. Then turn them over again, into their usual position and store them in a cool, dark place.
You can store it for up to a year in your home in the basement, and in your apartment in the pantry.
A quick and easy way to make jam with gelatin
To be honest, I don’t know a faster recipe for preparing a delicacy of this kind.
Let's see what and how.
As you can see, all the fruits remained intact. And although now the syrup still looks watery, this is only because the jam is still hot. But as soon as it cools down, it will immediately become thick, just as we wanted.
Using the same principle, you can prepare it with gelfix or pectin.
Thick and tasty jam with mint and black tea
This recipe is very unusual and interesting. Moreover, it is interesting both for its composition and its taste. You have never tasted such amazing taste and aroma.
I found this recipe in one of the women's magazines, and now I cook it every year.
We will need:
- pitted cherries – 1 kg
- sugar - 1 kg
- lemon juice - 1 tbsp. spoon
- tea with bergamot - 10 tbsp. spoons
- mint - 3 - 4 leaves
Preparation:
1. Sort the cherries, remove spoiled fruits and stalks. Rinse thoroughly in several changing waters. Then remove the seeds using one of the known methods.
After removing them, immediately place the peeled fruits in a cooking basin. She will begin to secrete juice, which we will use to prepare our delicacy further.
2. During the cleaning process, sprinkle the fruits with sugar in layers for better and faster dissolution.

3. Brew a fairly strong hour with bergamot, let it brew well for 10 - 15 minutes.
4. Then pour it into a basin and add lemon juice. What would tea be without lemon?!
Mix everything carefully so that the sugar can dissolve as much as possible. Since the tea is hot, this process will happen quite quickly.
5. Place the basin on low heat and heat the contents while stirring. The more it warms up, the sooner all the sugar will melt, and a sufficient amount of syrup will appear for further cooking.
6. Wait until the syrup boils and note the time.
Cook for 20 - 25 minutes, stirring occasionally, over very low heat. Make sure that nothing burns, and to do this, stir more often.
7. 5 minutes before readiness, add washed and dried mint leaves.
8. Prepare sterilized jars and lids.
9. Then take out the mint leaves and pour it hot into jars. Immediately roll up with metal lids using a seaming machine.

10. Turn the jars over and put them on the lid, wrap them tightly with a blanket or large towel. Leave for a day until completely cooled.
11. Then turn it over again and put it in a cool, dark place for storage.
I’m writing this recipe now and vividly imagining the aroma that spreads throughout the house while preparing this delicacy.
And the taste of such jam is simply unforgettable. It is both tender and slightly piquant, not cloying, but pleasantly sweet and sour. Be sure to try to prepare such a delicacy for the winter; you will treat it to your loved ones and guests.
Cherry jam for the winter, Kiev style
This recipe differs from others in that you will have to tinker with it more than with the others. How could it be otherwise, real culinary creations require attention and time.
Let's stock up on both and make some truly amazing cherry treats!

We will need:
- cherries - 10 glasses
- sugar - 10 glasses
- cherry juice - 1 glass
Preparation:
1. Sort the fruits, remove the stem and damaged fruits or fruits pecked by birds. Then rinse them thoroughly and let the water drain.
2. Using one of the known methods to remove seeds. First, we will need a cherry from which we will squeeze the juice. To do this, you can puree it using a blender and then squeeze out the juice through cheesecloth. And if you have a juicer, then use it.
As mentioned above, we will need a glass of juice.
3. Clean all 10 glasses.
4. Place a glass of cherries in a cooking basin, cover it with a glass of granulated sugar and pour a glass of juice over it all. Mix carefully so as not to crush the fruits.
5. Place over very low heat and, while stirring, melt the sugar and bring the mixture to a boil. Boil at low simmer for 5 minutes.
6. Then add a glass of cherries and sugar again. And wait until everything boils again and cook for 5 minutes.
7. Thus, gradually add all 10 glasses of cherries and sugar, each time bringing the contents to a boil and cooking for 5 minutes. When a sufficient amount of liquid has formed and you are convinced that all the sugar has melted, the heat can be increased to medium.

8. After the last, tenth portion, when the mass boils again and cooks for 5 minutes, immediately pour the contents into sterilized jars. Screw on metal caps.
9. Turn the jars over and wrap them tightly. Let cool in this state, you can leave them for a day. Then turn them over again into their normal position and store them in a cool, dark place.
“Drunken cherry” with coffee, cocoa and liqueur
And this recipe is even more original than the previous two. That is, this is an option for true gourmets, or connoisseurs of unusual delicacies in terms of taste. Now, having seen the composition of the ingredients, you will be very surprised.
By the way, this cooking option is also known under a different name, called “Black Forest”. Two such sonorous names oblige you to cook the same “sonorous” delicacy. What are we going to do now!
We will need:
- pitted cherries – 1 kg
- sugar - 0.5 kg
- cherry liqueur – 50 ml
- cocoa - 4 tbsp. spoons
- instant coffee - 4 tbsp. spoons
- gelatin - 10 g
- citric acid - 1/3 teaspoon
Preparation:
The peculiarity of the preparation of this option is not only the original composition of the ingredients, but also the fact that, unlike previous recipes, it will not have whole fruits in its final form, but crushed ones. However, it will not be a puree. More likely it will be confiture.
And the extent to which you want to grind them depends entirely on you.
1. Sort the cherries, remove the stem and rinse thoroughly. Let the water drain and remove the pit using one of the following methods.
2. Place the peeled fruits immediately into a bowl and sprinkle it with sugar in layers to release the juice faster. You can let it sit for 3-4 hours and let in even more juice, while the sugar begins to slowly melt.
But if you don’t have time, then you can simply mix all the contents and let it stand for only 30 minutes.
3. In both cases, before putting the cooking container on the fire, add instant coffee and cocoa. Stir again so that the bulk products are evenly distributed throughout the syrup.
4. Place over low heat and melt the sugar while stirring. Make sure nothing burns.
5. Once all the sugar has dissolved, bring to a boil, but do not boil. Remove from heat and grind the mixture in a blender to the desired consistency. But it is desirable that quite tangible pieces remain.
Just such a delicacy will be very convenient to spread on bread.

6. Place the jam back on the stove and bring it to a boil again, stirring frequently. After boiling, keep on the stove for only 3 minutes.
7. Pour in the liqueur and mix well. Wait until it boils again and immediately put it hot into sterilized jars. Close with metal lids tightly and airtight.
8. Place the jars on the lid, upside down, and wrap them in a blanket, tucking it in on all sides.
9. During the process of slow cooling under the blanket, the sterilization process will take place. This will allow the jam to be better preserved during the winter.
10. Then store them in a dark, cool place, turning them over and placing them in their usual position.
You can probably already imagine what a cherry treat this turned out to be! Delicious, aromatic and very original. Be sure to try it out! At least a couple of jars. I'm sure you'll like it!
"Cherry in chocolate"
Please tell me, who among us would refuse such a delicious thing as cherries, and even in chocolate? Do you know that such a delicious delicacy can be prepared for the winter?

Let's prepare it all together today.
We will need:
- pitted cherries – 500 gr
- chocolate – 100 g (bar)
- sugar - 150 gr
- vanilla sugar - 10 g
- lemon juice - 1 tbsp. spoon
- water - 100 ml
Preparation:
1. Sort the fruits, remove damaged fruits and stalks. Rinse under running water and remove the seeds. Place the peeled fruits immediately into the cooking container.
I would like to note that we need exactly 500 grams of cherries, and their weight should already be equal to the seeds.
2. Cover them with sugar. Add water and vanilla sugar. Squeeze the juice from the lemon and pour it into the mixture. Then mix everything carefully, trying not to crush the fruits.
3. Place the bowl or pan with the contents on low heat and bring to a boil, stirring frequently.

4. After boiling, keep on fire for 25 minutes so that excess liquid evaporates.
5. Divide the chocolate into slices and place it in a bowl. Mix well until it is completely dissolved. Bring to a boil and cook for 1 minute.

6. Immediately put into sterilized jars and roll up the lids.
7. Turn the jars over and place them on the lids. Cover with a blanket on top. Leave until completely cool.
8. Then turn it over again and put it in a cool and dark place. This treat is stored well, but usually not for long. Usually it is eaten within the first month of preparation.
So try it out in this test batch. In order to have time to cook a second batch, which you can save for the winter.
How to make jam in a slow cooker
I already shared this recipe with you in a previous article, where we also cooked. I would also like to add it to this article due to the fact that nowadays people cook a lot and often in a slow cooker.
And they also often ask how to cook this or that dish in this miracle pan.
Therefore, the recipe will be appropriate here too. The only thing, keep in mind that the jam is made with seeds, and the topic of our article today is somewhat different.
But it doesn’t matter, especially since there is only one recipe - no matter how you prepare it.
This was such a beautiful treat. Lovely - expensive to watch. So cook it this way if you have a multicooker and like to cook in it.
Cherry and orange jam
In the most amazing way, you can change the taste of familiar jam by adding just one orange to it. A delicacy already familiar to everyone acquires completely new flavor notes. Which can make his fans very happy.

We will need:
- cherries - 5 glasses
- sugar - 5 glasses
- orange - 1 pc.
- water - 3 tbsp. spoons
Preparation:
1. Sort the fruits, rinse thoroughly and dry. Then remove the seeds using one of the known methods.

In this recipe, you can measure the cherries in cups, both with and without pits. In the second case, the jam will be less sweet.
2. Sprinkle the fruits with sugar and pour in water. Stir, being careful not to crush the fruit too much. You can, of course, leave them for 2 - 3 hours so that they release the juice on their own.
But if you don’t have free time and the desire to wait, you can immediately put the contents on low heat. And as the sugar slowly melts, the juice will begin to release on its own.
At this time, it is better not to leave the cooking basin for a long time, and stir its contents often so that the sugar does not burn.
3. Bring to a boil.
From now on we have two ways of cooking.
- Let it stand for 1 minute on low heat. Then remove the basin from the stove and leave to infuse for 2 - 3 hours. Then cook for another 10 minutes, 2 times. A total of 3 times. And some people cook it up to four times.
- The second option takes more time. Bring the contents to a boil and cook for 5 minutes. Then let stand for 12 hours. And then cook 2 more times for 5 minutes at an interval of 12 hours.
4. In both cases, we will need to add an orange before the last cooking.
I've come across recipes where they simply cut it into cubes along with the zest and add it that way. This method does not suit me, since the partitions from the orange, as well as the white part located between the pulp and the zest, get into the jam. It is bitter and gives an undesirable aftertaste.
I do it differently. And now I’ll tell you how. I grate the orange zest on a fine grater. In this case, you only need to rub the orange part. The white part needs to be cleaned, freeing the orange from it. Once again we have two different options to choose from.
- Squeeze the juice from the orange and add only that. This is a faster way.
- And a longer method requires that all partitions and seeds be removed from the orange, and only then the pulp can be cut into small cubes.
Choose the method that you like best. By and large, this will not greatly affect the taste of the delicacy. Only if you choose the second option it will be a little thicker, and even then only a little.
5. Before putting it to cook for the third time, add the zest and juice, or orange pulp, and stir the contents.

To make this easier, the pelvis can be slightly rotated and shaken. The foam will accumulate in the center and you will remove the foam with ease.
7. Also, by the third time we need to have sterilized jars and lids. Because you will need to pour hot jam into them. Immediately close them with lids and roll them up or screw them on with screw caps.
8. Turn the jars over and cover with a warm blanket. Allow them to cool completely. Then turn it over again and store it in a cool, dark place.
When you cook, no one can even guess what it is made from.

Here everyone can guess by the characteristic appearance and color of the fruit. But the taste always leads to confusion, because it is changed compared to the usual classic one.
And if you like to change the taste of long-familiar dishes, then I advise you to find one of my articles on this topic. Finding it won’t be difficult, just follow the link and look at the table of contents. The only thing is that the recipe is given for cherries with pits, but it is the same even if we want to remove them.
Dry candied cherry jam without seeds
This jam can be prepared with or without seeds. Since the topic of our article today takes us to the second option, we will prepare it this way.
But without any changes to the recipe, you can cook cherries with pits according to it.
We will need:
- cherry – 1 kg
- sugar - 1.2 kg
- lemon - 0.5 pcs (small)
- water - 1 glass (250 ml)
Preparation:
The recipe is very simple and I think everyone will want to make at least a test batch of it. Because candied fruits and berries are a favorite treat and treat for tea. A wonderful and healthy alternative to candy.

1. Sort the fruits, rinse and let the water drain. Then remove the seeds.
2. Prepare sugar syrup. To do this, mix sugar with water and put the resulting mass on very low heat. While stirring continuously, begin to melt the sugar.
To make this process happen faster, you can add hot rather than cold water to the sugar.
In any case, you should not leave the stove for a minute at this time, so that the sugar does not burn. You need to constantly stir the thick sugar mixture, carefully moving it from the very bottom.
3. As the mass heats up, it will become thinner, and when it boils, you can dip the pitted fruits into it.
The boiling will stop immediately, and this is understandable; now you need to heat the cherry itself. To begin with, you should “bathe” it in syrup, you can stir it with a wooden spatula or spoon, or you can just shake it.
4. Wait until the syrup boils, let it simmer for 1 hour, while periodically stirring and moving the fruits so that they are heated evenly. Then turn off the heat and leave the contents to infuse for 8 - 10 hours.
If you cook it with seeds, the cooking time will need to be increased to 1.5 hours.
During infusion, the fruits will be saturated with their own juice and syrup, which will allow them to subsequently become very tasty.
5. After the allotted time, place it in a colander or on a sieve and let all the liquid drain. You can drain it by laying out the cherries in small batches.
6. The next step is to dry it. This can be done in the oven at a temperature of 35 - 40 degrees, or in an electric dryer at the same temperature.

To do this, cut a sheet of parchment paper to the size of the mold, place it in place and place the cherries on it. Then dry until ready.

The finished product should not produce juice when pressed, but its structure should be quite soft and elastic.
7. Sprinkle the finished candied fruits with sugar and place in washed and dry jars. Store in a dry place.
Serve with tea, treating all your family, friends and guests.
How to make thick and tasty seedless jam for the winter
Today we looked at several interesting recipes for making cherry jam. Among them were both classic versions and original ones, which are not so common.
But they are all united by several general rules, thanks to which it will not be overcooked and will be perfectly stored in the winter. It will not lose its color and will not thicken.
Let's look at these little secrets and rules in a separate chapter.
- Before cooking, all fruits should be carefully sorted. Remove damaged, dried, bird-bite. Some people think, “Whatever, it’s jam—everything will be cooked anyway.” I don't agree with such people. It will cook, but not like that!
Damaged fruits will shrink and become tough. If you get such a cherry along with a good one, you won’t even taste the good one.
- You can cook from different varieties of cherries, but you should know that depending on the variety you will get a different aroma and taste. Basically, now many people prefer the “spanka” variety. These are quite large, fleshy, smooth fruits with a dark ruby color.
And the most delicious and aromatic delicacy is obtained from ordinary garden varieties, sometimes not even having their own name. It looks smaller and brighter, usually having a bright red color

- fruits should be cleared of leaves, branches and stalks
- the cherry must be thoroughly washed in several waters and then allowed to dry
- You can remove the pits from it in several different ways. In the next chapter you will be offered a video where you can watch how to do it in the simplest ways
- When cleaning the seeds, the skin of your hands will be stained with juice and become dark. In a couple of days it will, of course, wash off, but if you have to go to work tomorrow, you won’t go with such hands. Or you will have to do a manicure and clean the skin of your hands, or you can simply put on gloves before cleaning
You need to have latex gloves for this task. They are like a second skin, and it will be much more convenient to clean the bones in them than in rubber ones. In addition, they will not give off any foreign odor. But rubber ones can ruin our smell
- the amount of sugar when cooking one way or another varies, and can be taken per kilogram of fruit from 500 grams to 1.5 kilograms. With more sugar, jam keeps better and longer, but it is also sweeter.
- It should be cooked in its own juice or syrup. To obtain its own juice, it is sprinkled with sugar and allowed to brew for a minimum of 3 - 4 hours to a maximum of 10 - 12 hours. During this time, either shake or stir
- To obtain syrup, water is included in the recipe components. The less it is, the thicker the jam will be. Therefore, in some places we added only a few spoons, in others 1 glass. And this is per kilogram of fruit. But nothing more
- When preparing syrup, sugar and water must be stirred all the time so that the mass does not burn. Otherwise, the finished product will acquire a burnt smell that cannot be overcome by anything. And it will certainly lose its ruby color and end up with a brown tint.
- Depending on the recipe, the jam takes a different amount of time to prepare. With short heat treatment, more vitamins and microelements are preserved. But it is more difficult to store, and it must be sealed tightly with lids, or stored in the refrigerator

- the minimum cooking time for cherry delicacy after boiling is 5 - 7 minutes
- Use a wooden spatula or spoon when stirring. When using metal spoons, an undesirable oxidation process occurs
- When cooking any jam, foam always forms and it is advisable to skim it off. This is necessary for better preservation of the taste of the dessert, and in particular for better storage in general.
- If you cook “five minutes”, then you need to have time to remove the foam during these 5 minutes of cooking. If you cook with “proofing”, that is, you allow the jam to steep for 10 to 12 hours, and sometimes up to 24, then skimming can be left until the very last cooking time.
In addition, the longer you heat, the less foam remains on the surface.
- To make it easier to remove the foam, rotate the cooking basin from side to side, or shake it lightly. The foam will accumulate in the center of the pelvis and it will be much easier to remove it
- Sometimes you need to determine the readiness of the jam, and this is done quite simply. If you drop a drop of syrup on a saucer, it should not spread, but remain unchanged. And we also dripped a drop onto the nail, and if it held on like a button, then the cooking process could be completed
- It is not advisable to digest it, as it becomes brownish in color and loses its beneficial properties and aroma. A properly prepared product should have a natural pinkish-ruby color, not be too thick and have its own smell (unless, of course, you added spices, cocoa and coffee)
- it should be poured only into sterilized, preferably dried, jars and screwed with metal lids

- sometimes they ask “why turn the jars over and put them on the lid?” There are two reasons for this - the first is to check the tightness of the jar. If the lid is not screwed on properly, the jam will begin to leak. And the second reason is to prevent the lids from oxidizing during storage.
These are the basic rules and little secrets that will allow you to always cook only the most delicious sweet cherry delicacy. Whatever recipe you choose for this.
How to quickly remove pits from cherries
Today, all our recipes began with the words that the cherries need to be sorted, washed and pitted. But not everyone most likely knows how to do this.
There are special devices for this. There are manual stone removers with a spring, they can be purchased at hardware stores.

There are even special mechanical devices into which you pour cherries, and by pressing a special lever, the seeds are removed and the fruits fall into the container.
But what to do if you have neither one nor the other at hand. There is a way, and more than one.
Well, first of all, probably everyone in the house has a garlic press. So, almost all of them have a special device for removing seeds.
But if you don’t have such an attribute of kitchen utensils, then you can clean the bones with a hairpin, a pin, or even a paper clip. And how to do this, please watch the video material.
I think that if you still had doubts about how to cook - with or without seeds, now, having learned that getting it out is not difficult, you will still decide to make seedless jam.
Moreover, it is believed that during long-term storage it releases hydrocyanic acid. I don’t know for sure whether this is actually true, in what quantity it is released and how much harm it causes to health. I know only one thing for sure.
From time immemorial this delicacy has been prepared in different ways. And I don’t yet know a single person who would complain about the presence of seeds in jam.
Cook as you wish. The main thing is to do it with soul and love, and then even the hydrocyanic acid in the seeds will turn out to be a medicine.
Bon appetit!
Summer is a wonderful time. You can go on vacation to the sea, go on a picnic. But on summer days they also have to work backbreakingly on their plots, especially during the harvest period. It is at this moment that you need to preserve cherry jam, which is very beneficial for the immune system, cardiovascular and nervous system.
A simple recipe for a delicious delicacy
Not everyone can afford to indulge in enough cherry jam, since every spoon eaten is fraught with weight gain. Those who closely monitor their figure should know that the calorie content of cherry jam is about 250 kilocalories per 100 g of product.
Today we will discuss how to make cherry jam. To insure yourself against incidents, it is better to remove the seeds. To do this, you can use both special and improvised means, for example, a hairpin or a pin.
Compound:
- 1 kg of cherry berries;
- 1.5 kg granulated sugar.
Preparation:

Lazy recipe
For those who do not have the strength or desire to bother with preparing cherries, cherry jam with pits is suitable. The process of preparing it is much simpler, because you don’t have to do painstaking work.

Compound:
- 1 kg cherries;
- 0.25 l of filtered water;
- 1 kg granulated sugar.
Preparation:

If you like thick jams and jellies, then add a little edible gelatin to the pitted cherry jam. There will be no difficulties in the process of preparing it. Read the instructions for diluting gelatin carefully.

Compound:
- 1 kg of cherry berries;
- 1 kg granulated sugar;
- 25 g edible gelatin.
Preparation:
- Pour the gelatin into a bowl and dilute it with filtered water according to the instructions on the package.
- Leave the gelatin to swell.
- We sort out the cherry fruits, wash them thoroughly and dry them.
- Using a special gadget or a hairpin, remove the pits from the cherries.
- Place the cherries in a thick-walled container in which we will cook the jam.
- Add granulated sugar and mix gently.
- Leave the cherries in this form for several hours so that the berries release their juice.
- Place the jam on low heat.
- After boiling, time it for exactly 20 minutes.
- Don’t forget to skim off any foam that forms and stir the jam.
- Place the gelatin mass in a steam bath.
- Let it sit until all the crystals dissolve and the mass acquires a homogeneous consistency.
- Add the gelatin mixture to the jam and stir.
- Bring the jam to a boil again and immediately place it in sterilized containers.
- After rolling up the lids of the cans, turn them upside down and put them in a secluded place.
- Wrap the jars in a blanket and leave until the jam has cooled completely.
- You can store this jelly-like jam in a cellar or basement.
Favorite jam with citrus notes
Fans of culinary experiments and delicious sweets will appreciate the taste of cherry jam with zest and freshly squeezed lemon juice.

Compound:
- 1 kg of cherry berries;
- 2 lemons;
- 2 kg granulated sugar.
Preparation:
- We sort out the cherry fruits and wash them.
- Use a convenient method to remove the pits from the cherries. We try to damage the berries as little as possible.
- Place the cherry fruits in a convenient thick-walled bowl.
- Sprinkle them with granulated sugar and mix gently.
- As in previous recipes, in this form the cherries need to be infused so that the juice is released.
- Using a grater, remove the zest from the lemon and add it to the cherries.
- Squeeze the juice out of the lemons and also add it to the jam.
- Place the jam on low heat and bring to a boil.
- After boiling, boil for five minutes. Don’t forget to stir the jam and constantly skim off the foam.
- After this procedure, remove the jam from the stove and leave for 12 hours.
- Then we repeat the same procedure three or four times.
- Prepare sterilized jars and lids in advance.
- After the last cooking, put the jam into canning containers and roll up their lids.
Cherry jam is bright, aromatic and tasty. You should not miss the moment from mid-June until August to stock up on cherries for the winter. This delicacy can be eaten immediately, or can also be preserved in jars so that you can take it out and enjoy it at any time. Picking cherries from a tree is all the effort you need to put into creating a sweet dessert. For jam you should only stock up on sugar. Typically, the ratio of sugar to berries is 1:1, but the recipes below provide different options, so the taste will vary slightly.
Delicious cherries have a number of benefits. It is endowed with antipyretic properties, also anti-inflammatory and antibacterial. Its high content of vitamin C helps strengthen the immune system. By consuming it regularly, you are guaranteed a strong circulatory system. But it is often not possible to eat it, since like all berries, it is a seasonal fruit. Cherry lends itself perfectly to heat treatment, so it can be safely preserved in any form. It can be juice, compote, jam. In winter, cherry jam can be eaten as a snack with tea; it is also perfect as a filling for pancakes, buns, a layer in cakes, and an ingredient in pies. It is worth noting that when exposed to hot temperatures, some of the beneficial cherry substances are lost, but the main part remains. The remaining positive elements include its ability to improve appetite, treat inflammatory processes in the stomach, intestines, throat and much more.
Cherry jam without seeds
 To make pitted cherry jam you need 2 kg of berries. If the berries are sour, then you will need 2.4 kg of sugar, sweet varieties require 1.6 kg. This delicacy usually turns out thick, so if you are a fan of viscous and rich jam, then use the recipe below.
Preparation:

You don’t have to throw away the pits with the remnants of the cherry pulp on them, but cook a compote.
Cherry jam with pits
 Jam with seeds uses more sugar than cherry dessert without seeds. And all because the seeds absorb a certain part of the sweetness. This cooking process takes a long time, requiring 3 batches, which means you need to plan more time for making the sweet dessert. It will take a kilogram of cherries and five and a half glasses of sugar. For the syrup you will need 4 glasses of water (1 glass – 150 grams).
Preparation:

The jam is ready! Enjoy your tea!
Instead of immersing cherries in boiling water, you can make a prick in each berry .
Cherry jam “Pyatiminutka”
 For those wishing to preserve as much of the beneficial cherry substances as possible, the option of quick heat treatment of the fruit is offered. Five-minute cherry jam is obtained with an undestroyed berry shape and a bright, rich color. This sweetness will take 1 kilogram of cherries, only 400 grams of sugar and 200 grams of running water.
Preparation:

When removing seeds, it is better to wear gloves. Cherry juice is so corrosive that you will have to wash your hands for a long time.
Cherry jam with chocolate
Those interested in how to cook cherry jam with additives are invited to  A delicious recipe for cherry jam with chocolate. For such an unusual dish you will need 500 grams of pitted cherries. It can be not only fresh fruits. Frozen also works great in the recipe. A hundred-gram bar of dark chocolate will complement this masterpiece. Additional components will be a glass (150 grams) of sugar, a large spoon of freshly squeezed lemon juice, 50 grams of ordinary running water and, if desired, you can add 100 grams of cognac.
Preparation:

Making cherry jam is a real pleasure. You just have to wait a while for the berries to absorb the sugar, but waiting is not working. Usually, the saturation time takes up to 10 hours, depending on the type of fruit and its sweetness. The presence of seeds in the berry, which also absorb sugar, also matters. Have some delicious jam and enjoy your tea with it!